Configuring Xlwings in Scenario Tool#
The RESOLVE Scenario Tool is a user-centric model interface, designed to link data, inputs, assumptions, and constraints with the RESOLVE code. The primary step in being able to make that linkage is making sure that xlwings is correctly set up.
As an initial step, make sure that the Scenario tool is in the directory of the resolve folder. Next in the Scenario Tool head to the xlwings.conf tab, which should be towards the end. On cell B10, “Location of kit code” please input the appropriate file directory. Depending on your machine update the Python Path in Cell B1 or Cell B2. Keep everything else in this tab empty.
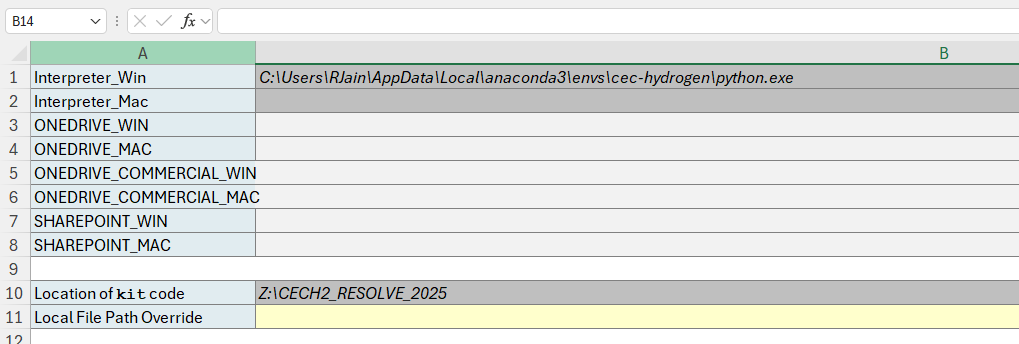
Windows Excel Configure Python Path:
Open Command Prompt or PowerShell and activate the environment with the command
conda activate resolve-envType the command
where pythonto see where the resolve-env version of Python is stored. This should look like:C:\Users\[username]\Anaconda3\envs\resolve-env\python.exePaste this path into the Python Path cell.
⚠️Warning
Make sure to use a backslash \ (and not a forward slash /) on Windows for the Python path.
MacOS Excel Configure Python Path:
Open Terminal and activate the environment with the command
conda activate resolve-envFirst time setup only: Run the command
xlwings runpython install. You should see a prompt from macOS asking you for permission for Terminal to automate Excel. You must allow this.Type the command
which pythonto see where the resolve-env version of Python is stored. This should look like:/Users/[username]/anaconda3/envs/resolve-env/bin/pythonPaste this path into the Python Path cell.
Make sure to use a forward slash / (and not a backslash \) on macOS for the Python path.
For example, if you are using windows, open the command terminal and activate the environment. In this instance, the environment is called cpuc-irp
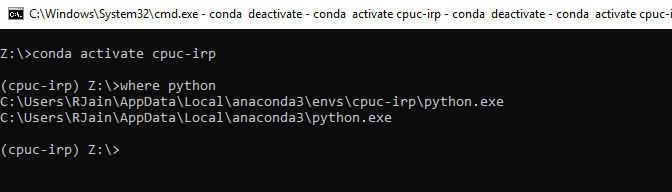
Use the file path which has the environment name embedded in it.
Once this is done, please head to the Cover tab at the beginning of the Scenario Tool. If you have made the right updates and have installed the environment correctly, you should be able to recalculate the spreadsheet and notice that the Cells C22 & C23 are now filled up. In cell C31, you will have information on the xlwings version, make sure that this is v 0.30.15 or above.
Your cover tab should look something like this:
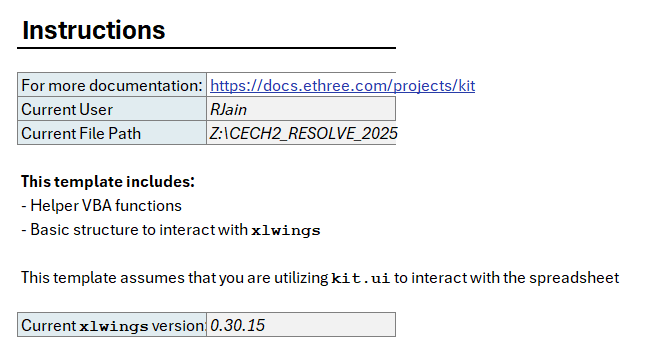
Example of Cover Sheet Settings in Scenario Tool
With this, the initial set-up phase of the Scenario tool should be completed, and the user should be able to make changes/updates to the scenario tool and run cases.