🤞 3. Running RECAP
Sept 15, 2023
20 min read
Set-up for Running RECAP
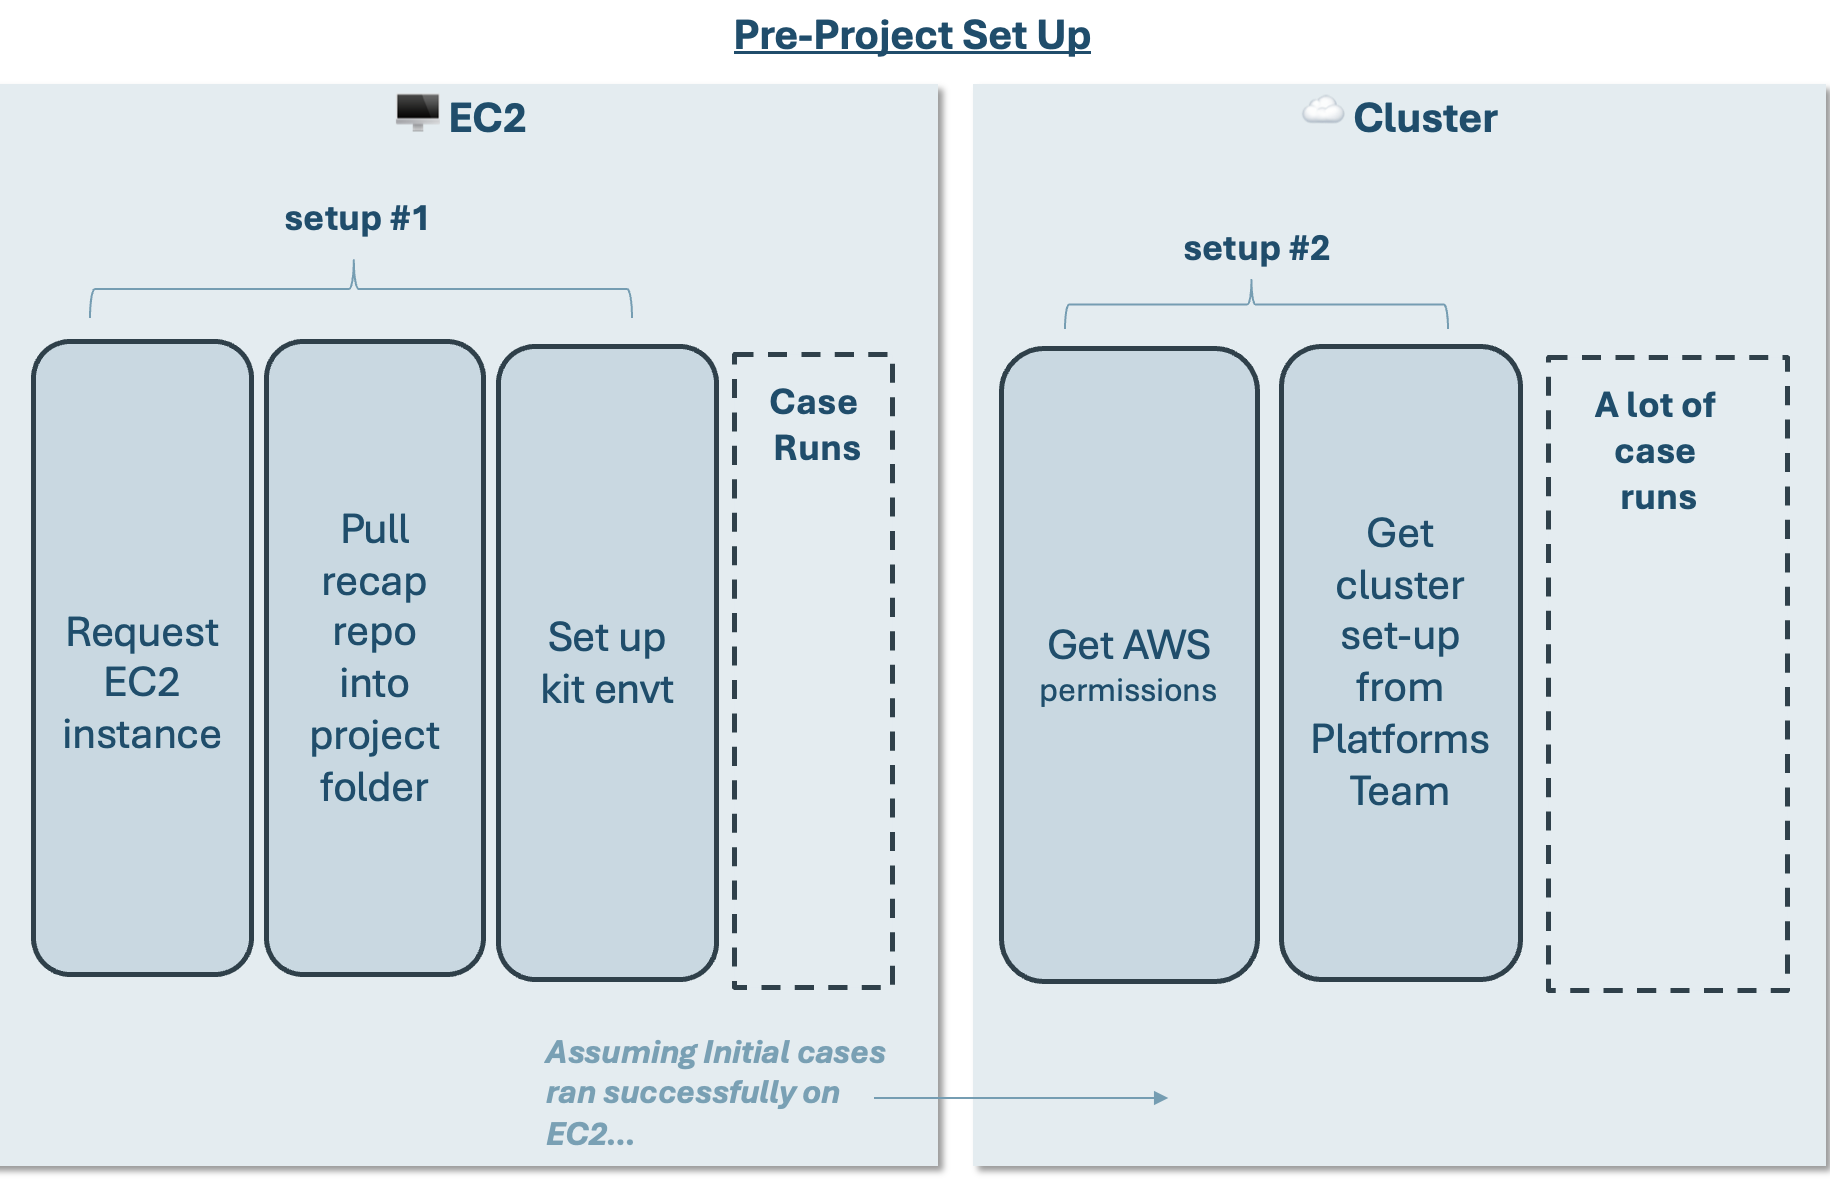
In order to run RECAP you will follow the general workflow. Note that both EC2 set-up and cluster set-up require coordination with other E3-ers so please reach out and plan accordingly.
EC2 Set-up
EC2 Set-up (1-2 day lead time)
Request EC2 Instance: Reach out to Pete to request an EC2 instance.
Pull recap repo into project folder + Set up kit envt
Pull recap repo into project folder + Set up kit envt
Follow kit set-up instructions here.
Use the following branch for RECAP:
recap_mainYou can checkout this branch using your IDE (Pycharm, VSCode), Github Desktop, or the command
git checkout [BRANCH_NAME].
Cluster Set-Up (1-3 day lead time)
Cluster Set-Up (1-3 day lead time)
These Steps for Cluster Set-up assumes you already have a working case in an EC2 instance. This helps you get your project on the cluster.
Get permissions for AWS, FrontEgg, and
the next sections will point you to the right places for permissions
Cluster Set-Up (1-3 day lead time)
AWS
If you do not have AWS credentials (if you do, there is an AWS tile on your Okta home page): Put in a ticket with WilldanIT to add a new user’s Willdan Email Addresses to the AD group: “E3 Developer”. Do not mention AWS in the request.
Once you have AWS permissions you will need to configure your
aws-cli. These instructions are provided in the general cluster guide here.
Front Egg
Ask Pete Ngai (IT manager) for instructions
Datadog?
Ask Pete Ngai (IT manager) for instructions
Setting up project onto JupyterHub
By the end of this, you should have the following down:
Created a project-specific Workspace
Linked your Github Account to your Workspace through a SSH Key
1. Create your Workspace (For those with Github Write access)
Go to the following link:
https://github.com/e3-/enkap-saas-controllerPull the
mainbranchGo to the folder within the branch
/clusters/x-ray/platforms/e3labsCopy an existing project
.yamlfolder and create a new.yamlfolder for yourOpen the
.yamland change the following fields:metadata/name:e3/gurobi/license:workflow/model:workflow/projectId:
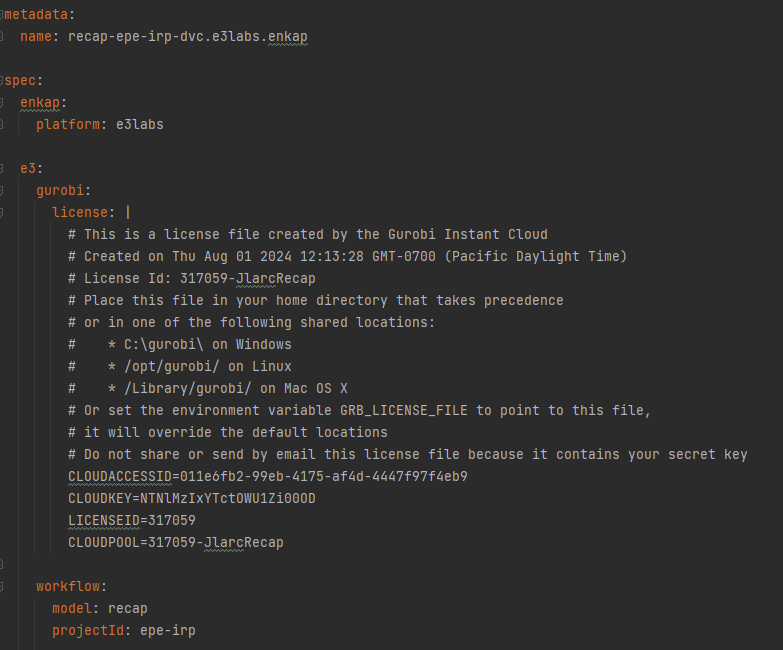
Save the file
Commit the changes and push back to main
2. Link Github Account through an SSH Key
Once you create a workspace, open a browser and enter this link: https://jupyterhub.e3labs.x-ray.ethree.cloud/
Start the server associated with your workspace / project
Once you start your server, this is the home page for JupyterHub
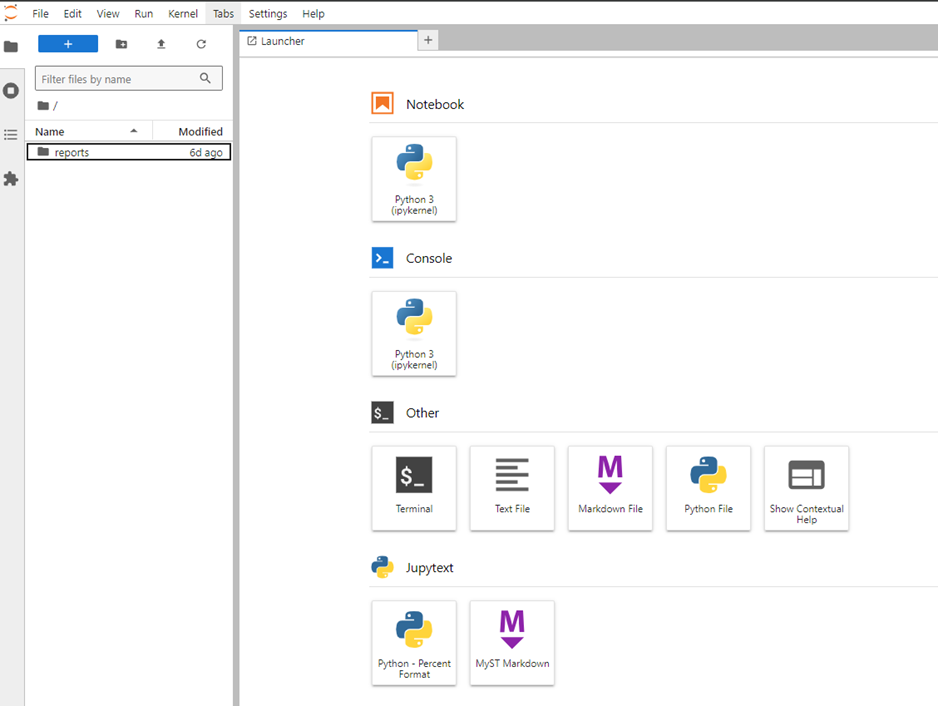
Open Terminal from your server / workspace
Copy and paste the following codeblock and hit enter
ssh-keygen -t ed25519
It will prompt you for a file in which to save the key, hit
enterinsteadIt will ask for a passphrase, hit
enterinsteadIt will prompt for the passphrase once more, hit
enteragain. 9. A total of 3enterswill get you to the following results. This is normalThis will create a window that will look similar to the screenshot below
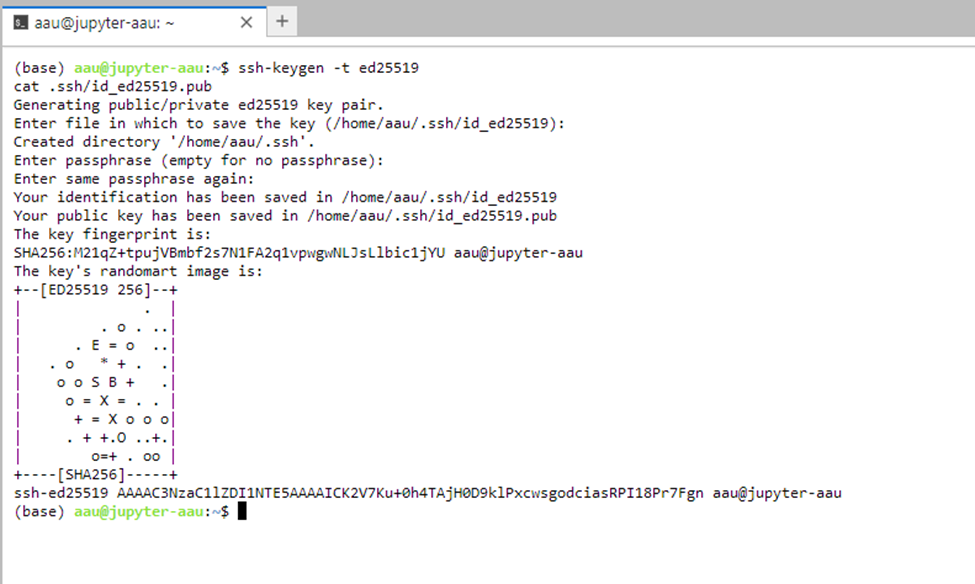
Now copy and paste the following code block
cat .ssh/id_ed25519.pub
This will generate a SSH key, see the screenshot below for an example. We will need this later in step 16.
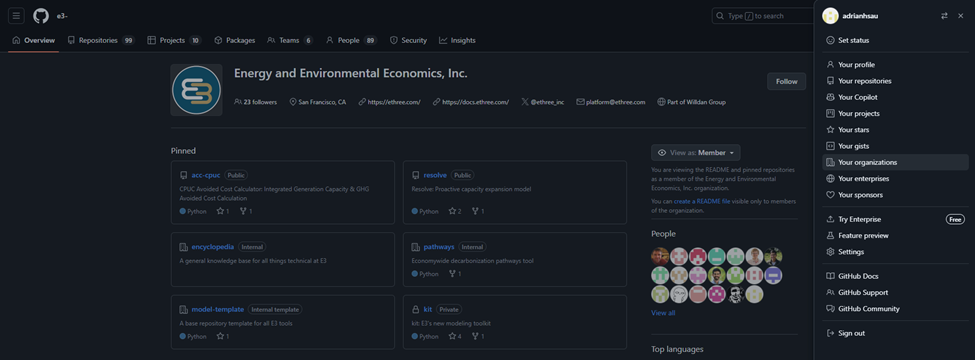
Open a new tab in a browser and go to https://github.com/e3-
Sign in through the organization page
Once signed in, go to the top right and click the profile icon, then the tab called “Your organizations”
 15. Once there, click “SSH and GPG Keys” on the tab on the left bar, and click “New SSH key”
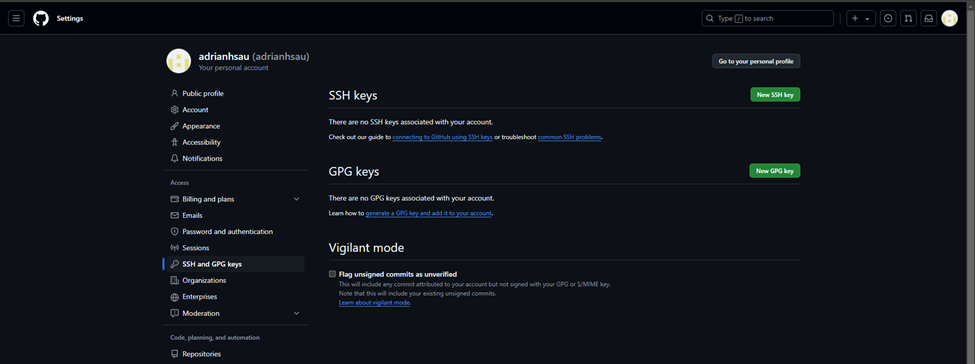 16. This will prompt you to add the SSH key. Enter the information and add the key. This will prompt a 2FA authentication.
* Title = [WD username]@jupyter-[WD Username]
* Key Type = Authentication Key
* Key = [SSH key generated in Step 11]
16. This will prompt you to add the SSH key. Enter the information and add the key. This will prompt a 2FA authentication.
* Title = [WD username]@jupyter-[WD Username]
* Key Type = Authentication Key
* Key = [SSH key generated in Step 11]

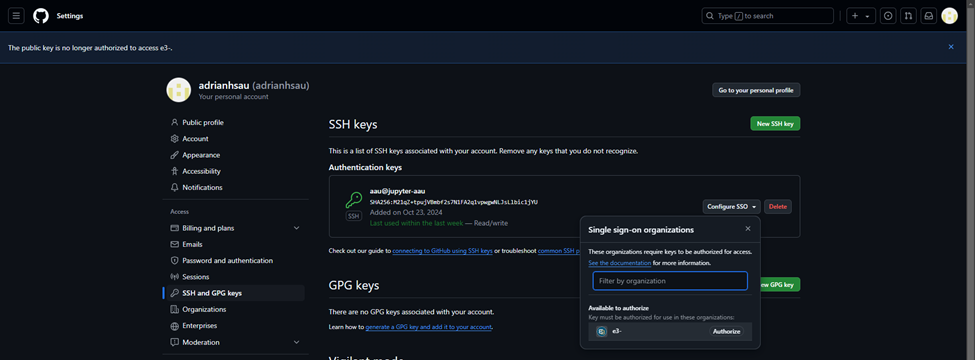
Once you get to this page with a new SSH key window, click the dropdown for “Configure SSO” and click “Authorize” next to the e3- organization
Go through the steps to authorize until you return back to this page. This completes linking Github to your Workspace
Running RECAP Locally / EC2
EC2 Background Info
AWS EC2 instances are remote desktops that enable E3 to (1) Size instances according to project needs and (2) Utilize a shared (Z:/) drive.
For a new project, you will have to request to be assigned an EC2 instance
Reach out to Pete to request an EC2 instance.
An EC2 instance is used to perform initial model set-up and to run preliminary cases to confirm that the system is behaving as expected.
The instructions for running a case are spelled out in detail in the Toy Model guide.
These same instructions apply whether the case is run locally or on an EC2 instance.
Instructions specific to running the model are re-included below for context.
Running RECAP from the UI
Choose the case and execute the model: Click the cell that contains the correct case and press “Run Recap Cases” button to run the selected case. This will initiate a separate Command Prompt window showing the progress of the model.
can I execute the model from the command line?What’s happening here?
can I execute the model from the command line?
Recap 3.0 can also be run from the command line! This can be useful if the UI macros are giving you trouble.
To run Recap from a command line, open a Command Prompt (or another terminal app, like PowerShell) in the
“./kit/Recap/”folder and activate the environment using the following command:conda activate [environment-name](per the setup example above:conda activate nve-Recap-kit). Then use the following command to run the case:python run_model.py.To specify which case you’re running, update the
cases_to_run.csvwithin the“./data/settings/Recap/”folder. Users now only have the choice to run one single case, the developer team is working on speeding modeling up to run a batch of cases in parallel.
Running RECAP in the Cluster
The cluster provides the most scalable way to run RECAP (and RESOLVE).
Users should first confirm the model behaves as expected on an EC2 instance before migrating runs onto the cluster.
The following sections will guide you to (1) run cases on the cluster and (2) sync results to your folder
If you have not set up on the cluster, see the above instructions to set up the Cluster. It will take 1 day to fully set up.
Running on the cluster only works if you have an active branch in kit with all your cases committed to that specific branch.
Running Cases
Open a browser tab and enter the following link: https://jupyterhub.e3labs.x-ray.ethree.cloud/hub/home
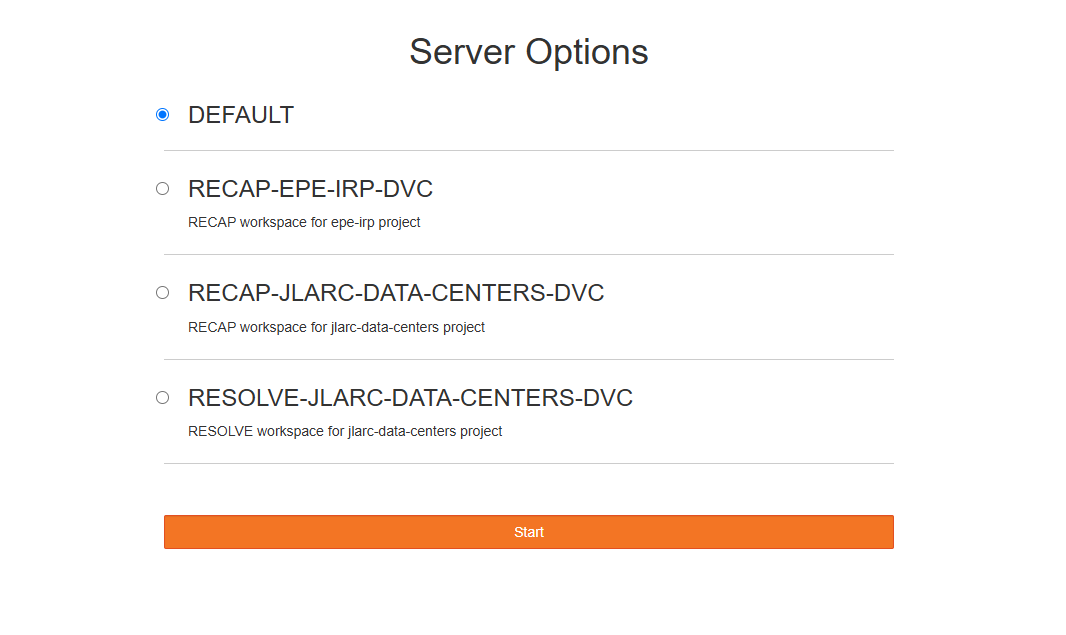 2. Choose the Workspace for your project and click start. Please see set up instructions for Workspace setup if your project is not present.
 3. If github is correctly linked, your project folder should already be loaded. If not, you must log into Github through JupyterHub and have an SSH key generated. See (“2. Link Github Account through an SSH Key”)[2. Link Github Account through an SSH Key] above
4. To ensure that your project is synced, open Terminal (3rd row down, 1st icon on the left) and type the following
3. If github is correctly linked, your project folder should already be loaded. If not, you must log into Github through JupyterHub and have an SSH key generated. See (“2. Link Github Account through an SSH Key”)[2. Link Github Account through an SSH Key] above
4. To ensure that your project is synced, open Terminal (3rd row down, 1st icon on the left) and type the following
dvc pull
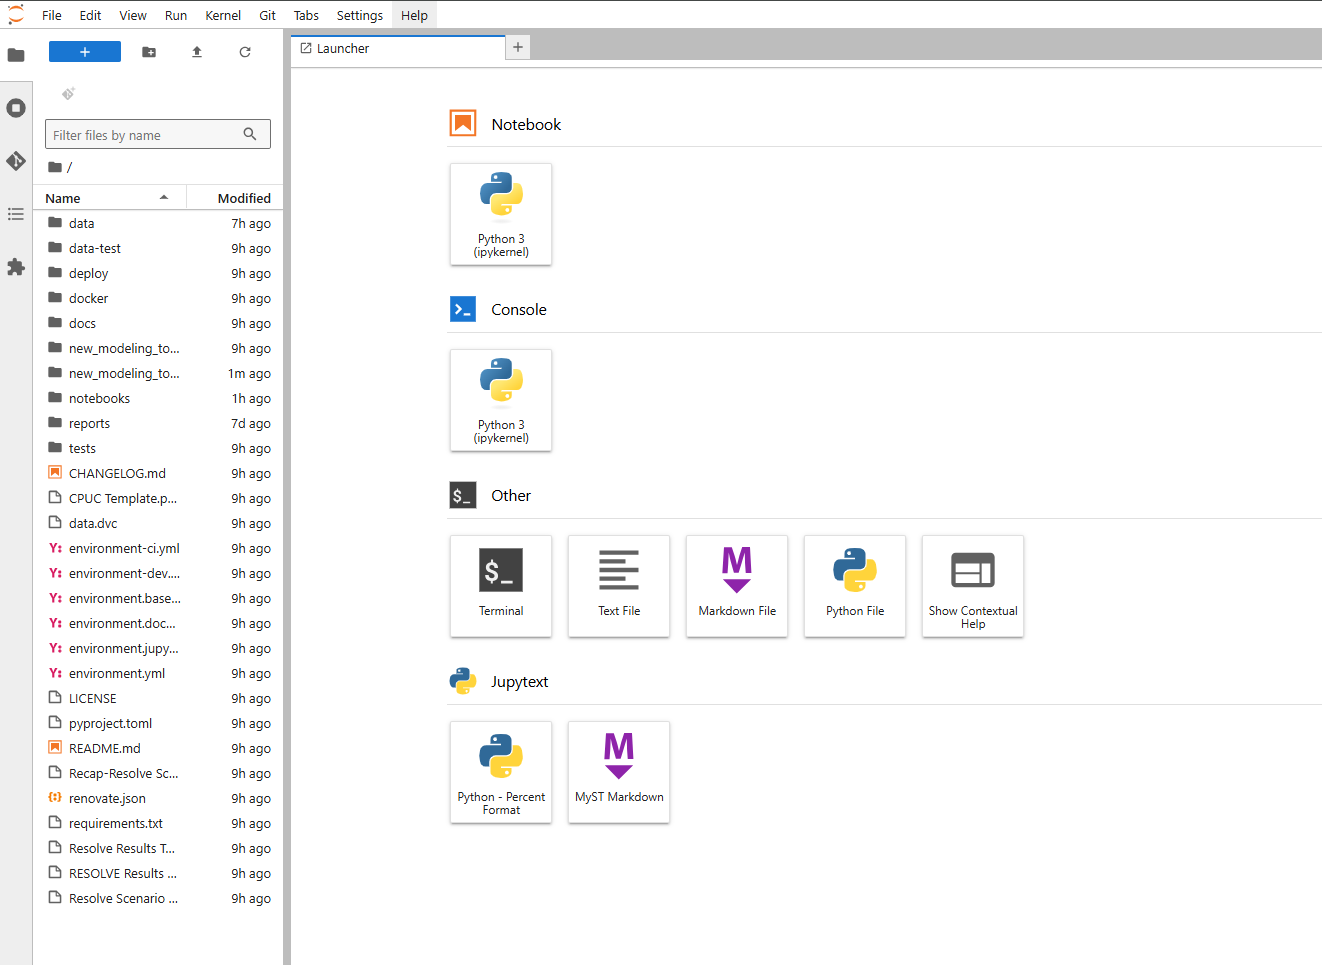
Once down, return to the home page and navigate to the
notebooksfolder and opencloudrunner.ipynbOnce that’s open, run all the code block by select the block and hitting
ctrl+enterYou should see 2 main windows.
Cloudrunner >> A window with a Case List of all Cases you’ve generated
Cloudwatcher >> A window of Case Statuses.
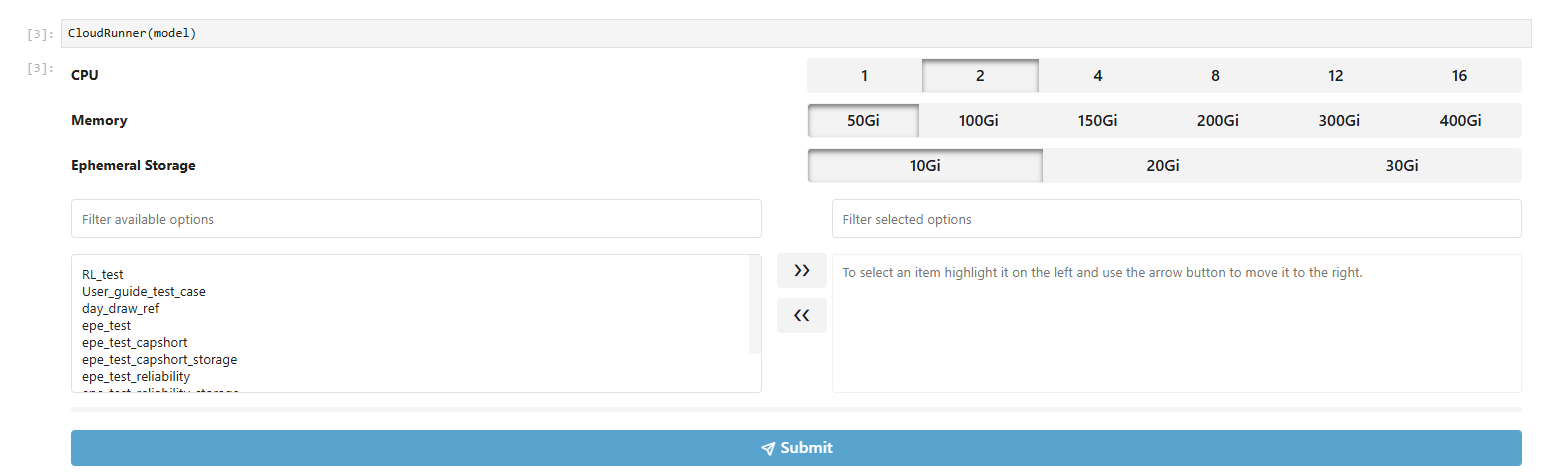
Cloudrunner allows you to drag and select cases you want to run in parallel. Choose your cases and move it to the right window using the arrows. Submit cases by clicking the
SubmitbuttonIt’s important to configure the right CPU, Memory Size, and Ephermeral Storage. Ask Adrian, Ruoshui, Karl for more information about these.
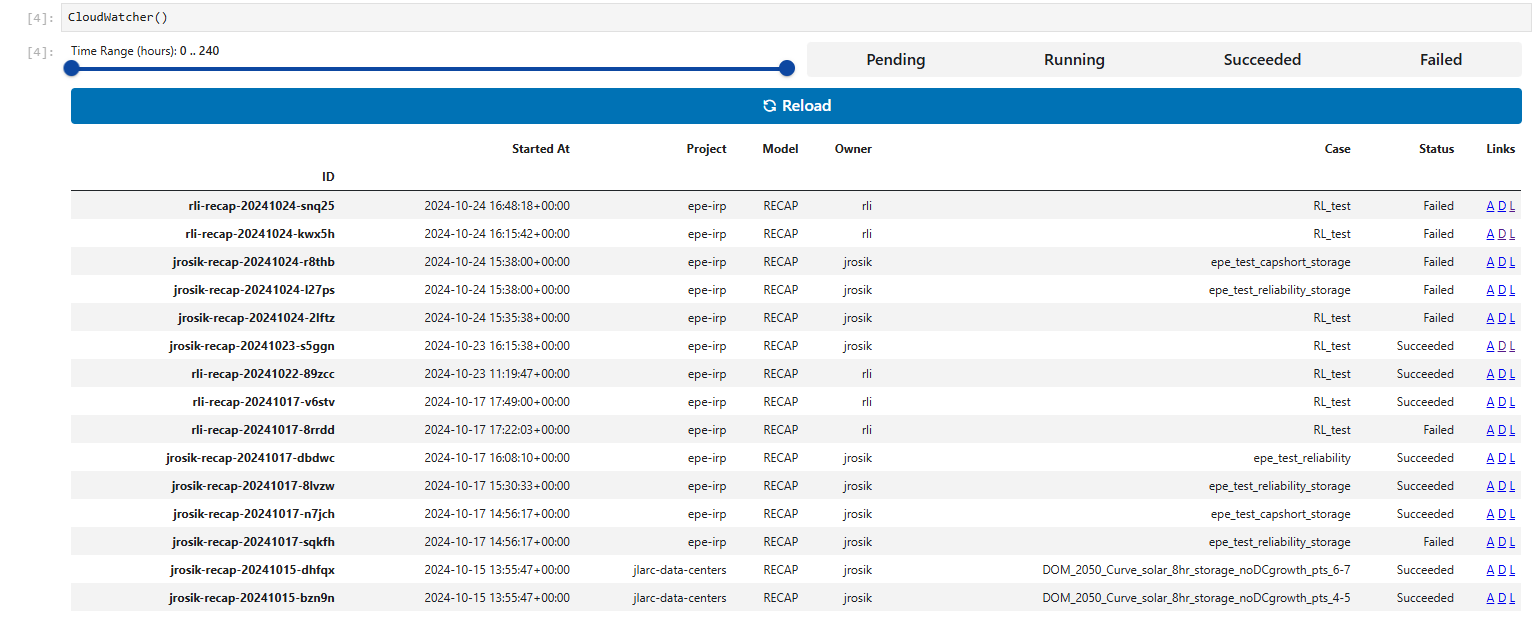
Once you submit cases, hit the
Reloadbutton in Cloudwatcher.Each case you’ve submitted should show up in Cloudwatcher. At this point, any project member can monitor the cases by running the Cloudwatcher block.
Using the Cloudwatcher, you’re able to monitor cases that are running, done, or failed. Use the links
DandLto monitor the case running memory size and logs, and useAif you are interested in the Argo workflow.Note: it’s good to know what the links do, but if you have guaranteed success in an EC2 instance, you rarely need to check these unless you’re trying to gauge memory size.